Currently Empty: $0.00
Creating food photography GIFs is a fantastic way to infuse your work with extra flare and excitement. They can also add additional context or more effectively tell the story you wish to convey. Here, you’ll learn how to bring your photos to life through animated GIFs using industry-standard editing software.
What You'll Need
Camera
The first thing you’ll need to create tasty looking food photography GIFs is a camera. Any camera will do (including cellphones), but for professional uses, a DSLR or mirrorless camera is recommended.
Camera Stabilization
Depending on your shot’s angle, try using a sturdy tripod or overhead mount to stabilize your camera. This extra bit of stabilization will allow you to create a sequence of photos that emphasize the animation movement. However, everything else in the scene will remain stationary.
A Delicious Scene
The most important thing you’ll need, of course, is a mouthwatering scene! It’s best to choose a subject that can be interacted with somehow. Whether drizzling syrup on a stack of golden pancakes or dusting a cloud of powdered sugar over freshly baked brownies, you’ll want to find a way to create interest through movement with your subject matter.
Otherwise, you could create a ‘before and after’ or process animation food photography GIF, as demonstrated below. In these cases, your sequence of images would be made in the post-processing (editing) phase.
Computer Access & Editing Software
Lastly, you’ll need a way to process (edit) your photos to string the images together to create your animated food photography GIFs. This article will demonstrate this technique using Adobe® Lightroom® and Adobe® Photoshop® software.
How To Create Food Photography GIFs In Adobe Photoshop
Style, Photograph, And Collect Your Images
Spend some time styling, lighting, and photographing your scene. You should practice your movements a few times to ensure your composition looks good as you execute the action. Take as many photographs as needed; 5-7 images usually work well for food photography GIFs.
Once you have a set of photographs you’re pleased with, back them up to a hard drive and begin your editing workflow. I recommend Adobe Lightroom Classic, Adobe Camera Raw, or Capture One for initial edits and Adobe Photoshop for more detailed retouching. Whatever your preference, just be sure to sync your global edits across all of your selected images so that they receive the same treatment.
Open Images as Layers in Photoshop
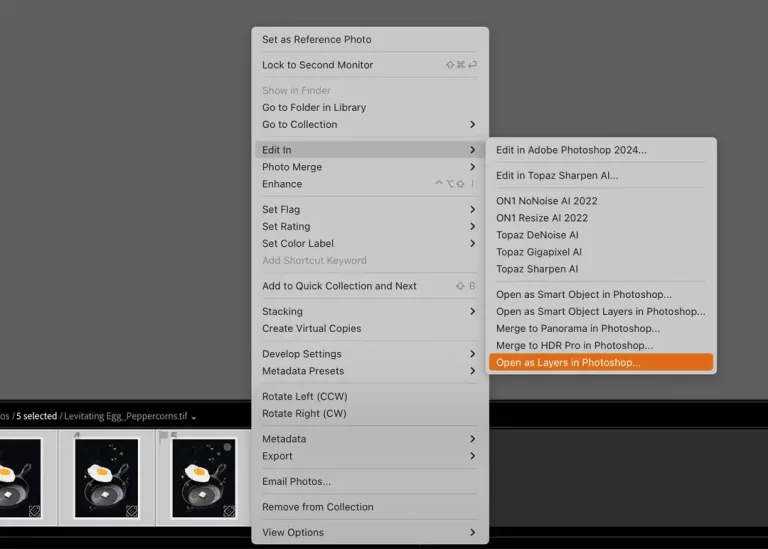
Now, we need to open all edited images as layers in Photoshop. If your pictures have already been imported into Adobe Lightroom, the easiest way is to group-select your photos, right-click, and choose ‘Edit in’> ‘Open as Layers in Adobe Photoshop…’. This will prompt Lightroom to open your images as separate layers in a single Photoshop document.
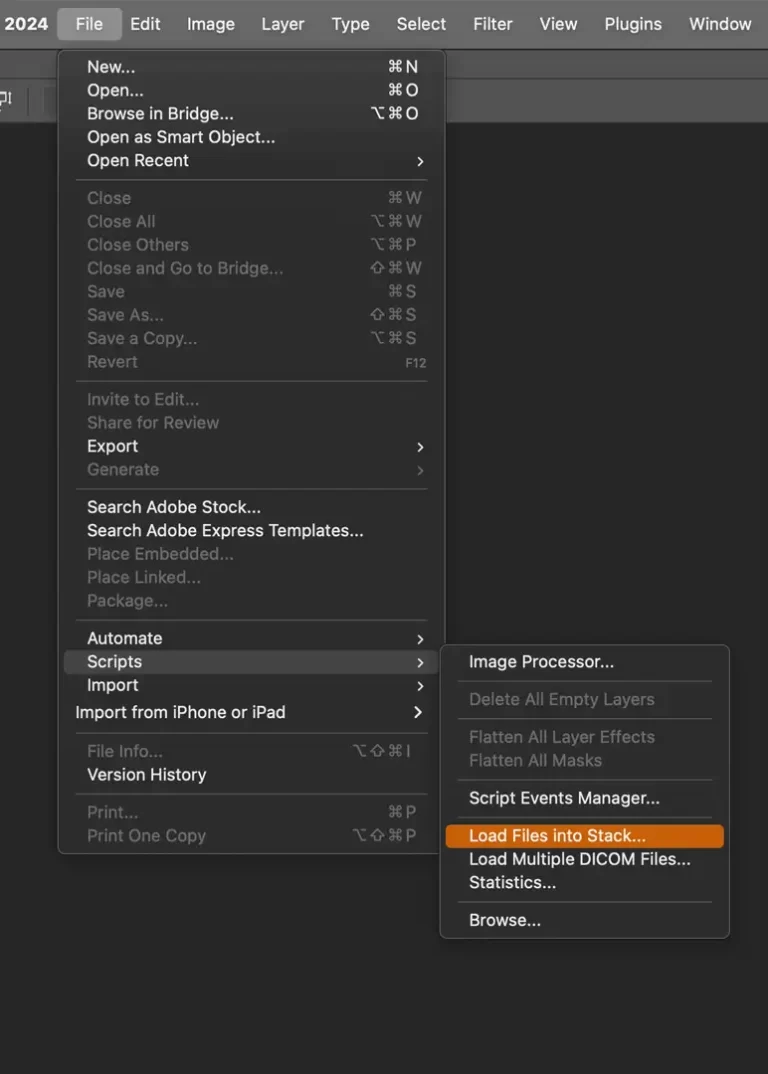
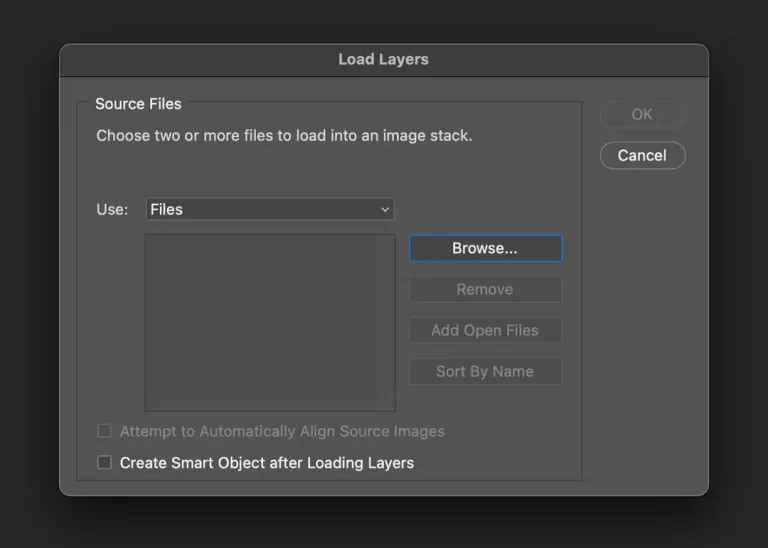
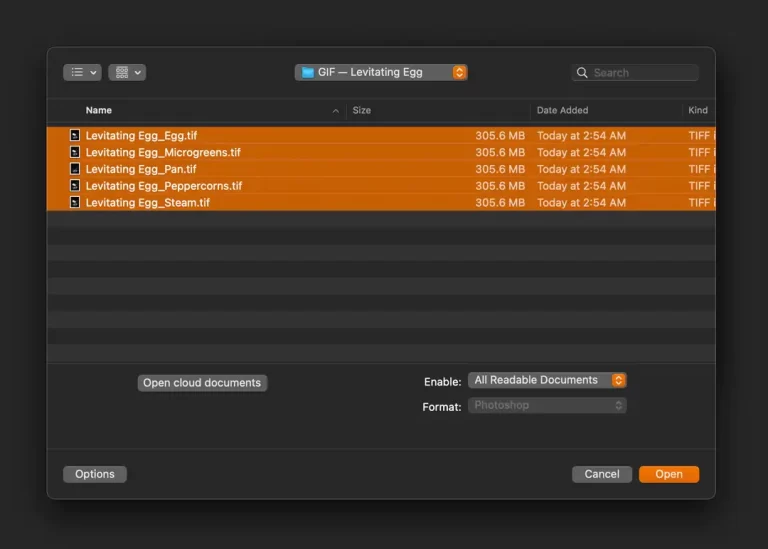
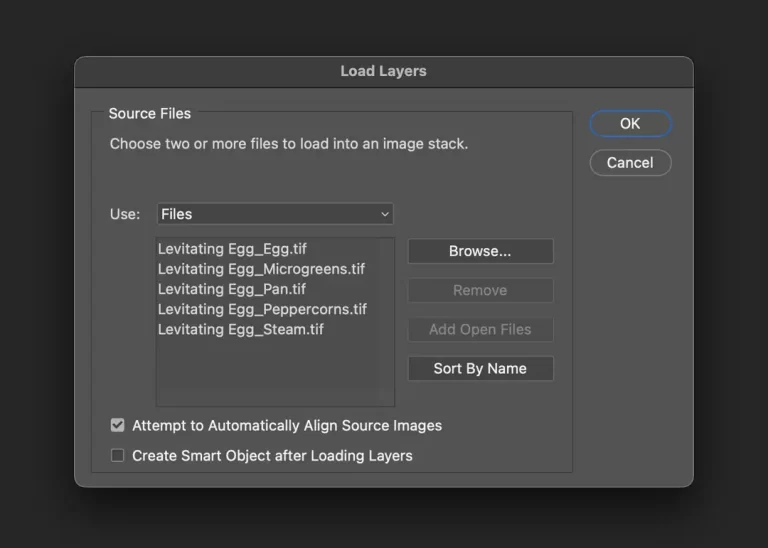
Suppose your images exist on a hard drive. In that case, you can open them as layers by first launching Adobe Photoshop, selecting ‘File’ from the ribbon, navigating to ‘Scripts,’ and selecting ‘Load Files into Stack….’. Follow the prompts to browse, select, and import your files to Photoshop.
Resize Images For Final Output Destination
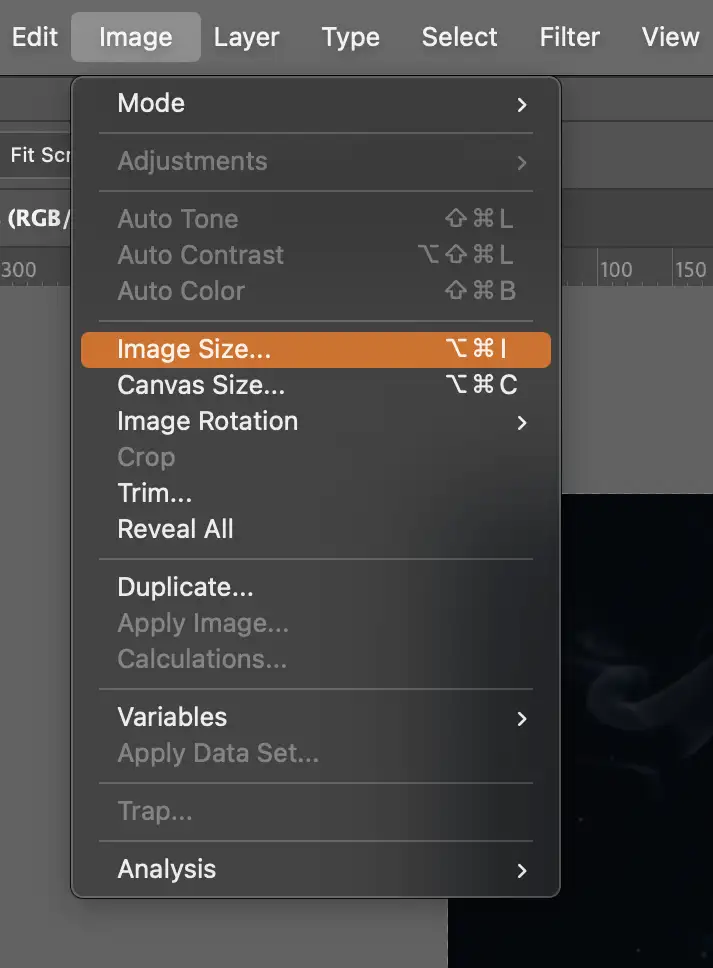
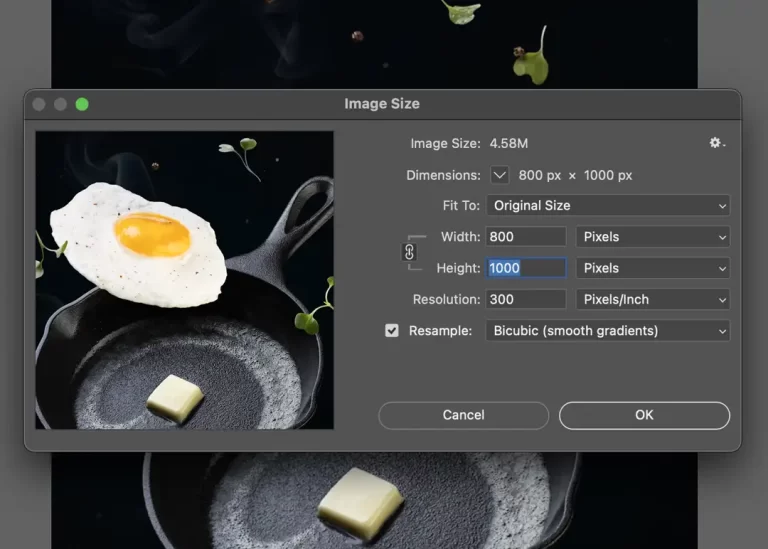
Now that the files have been loaded as layers, we must resize the images with the final output destination in mind. For example, if you plan to publish to Instagram®, try resizing the long edge to 1000-1080px. For best results, choose ‘Bicubic (smooth gradients)’ as the interpolation (resampling) method, which is the fancy term for how Photoshop throws away those extra pixels for the purpose of resizing.
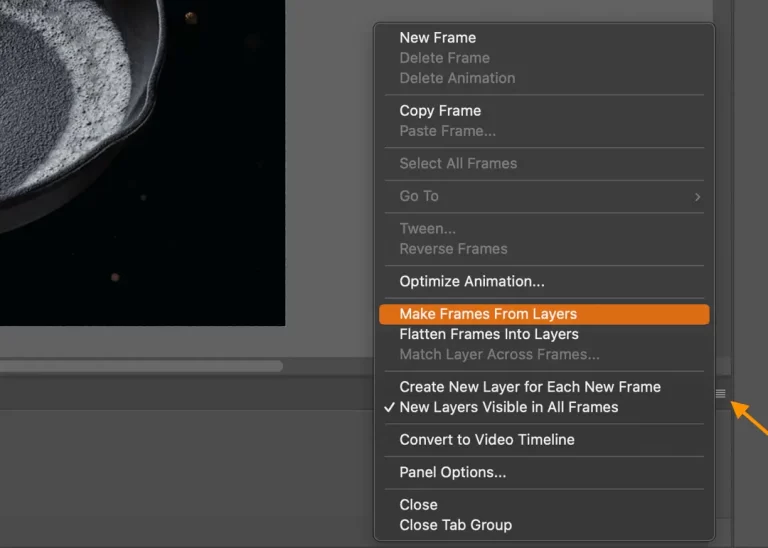
Make Frames From Layers Using Timeline
Now that your images are imported as layers and have been properly resized, its time to make some motion magic!
The panel needed to create GIFs is not visible in the default workspace and will need to be activated first. To activate this panel, select ‘Window’ from the ribbon, choose ‘Timeline’ from the drop-down menu, and click ‘Create Frame Animation’ from the panel options.


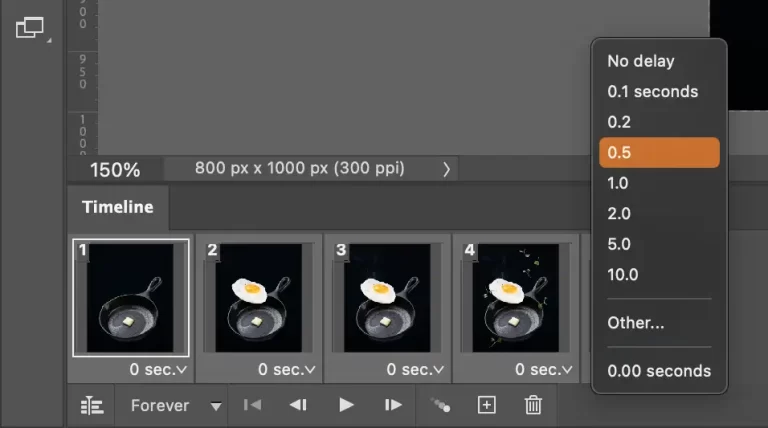
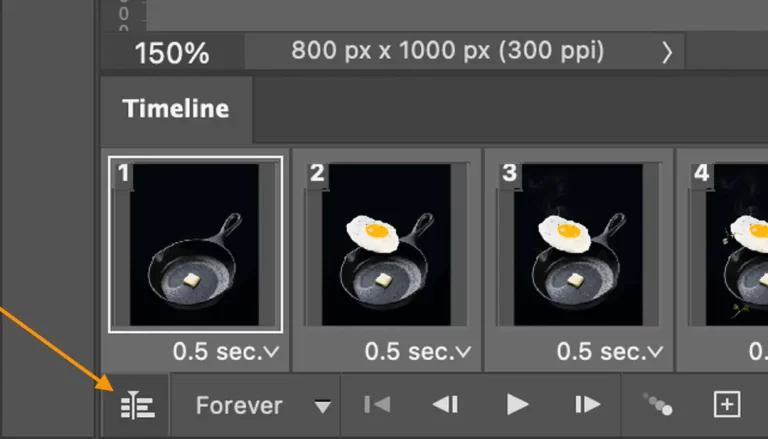
Now, it’s time to create individual frames from the image layers and to make some creative decisions regarding the display duration of each frame. If you want your images to cycle through the stack in incremental steps, a time of 0.2-0.5 seconds per image is a great place to start. Select ‘No Delay’ if you want your GIF to render as a video with little to no detectable steps or pauses. In most cases, you’ll also want to make sure ‘Forever’ is chosen so that the animations run on a loop.
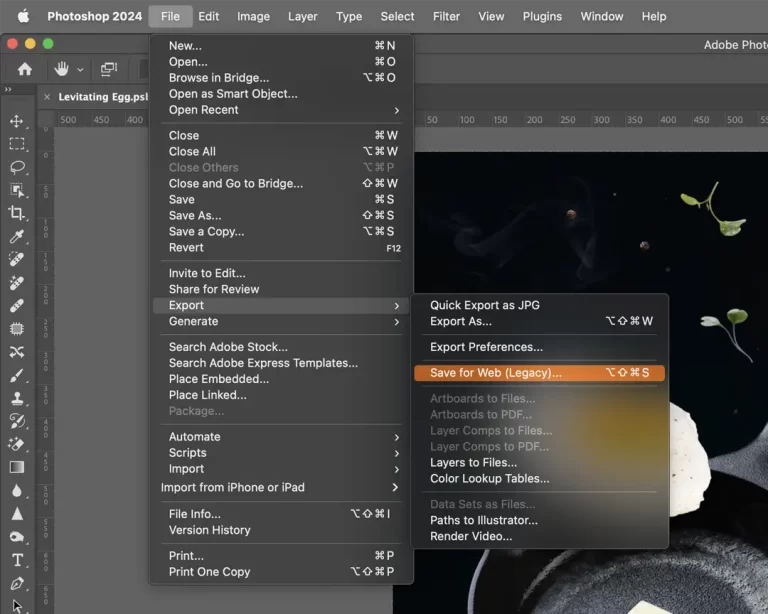
Export Sequence as a GIF For Web
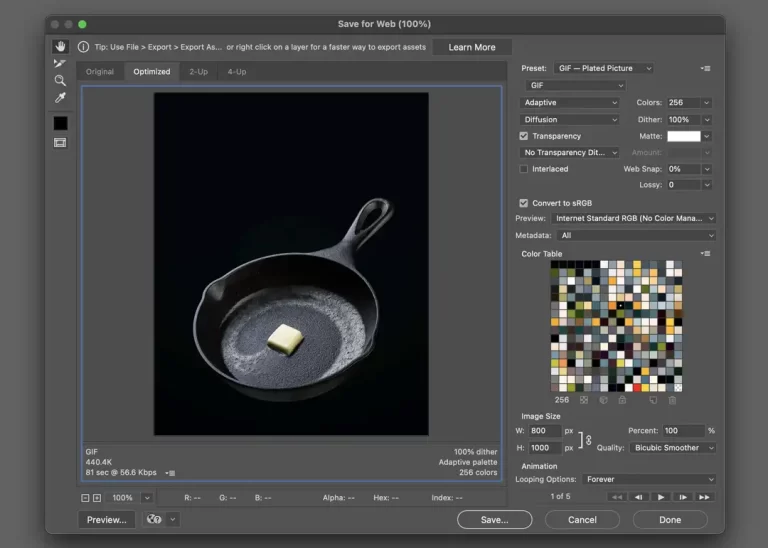
Once you’re happy with your animation sequence and its settings, export your animation by navigating to ‘File’ > ‘Export’ > ‘Save for Web (Legacy)…’ and manipulate the settings to your liking. My preferred export settings are illustrated below.
Export Sequence as a GIF For Instagram
If you plan to publish your GIF to a social media platform like Instagram, you’ll need to make a few changes to the above settings so that your GIF renders correctly in post format.
First, you’ll need to ensure that your GIF animation meets Instagram’s minimum 3-second video requirement.
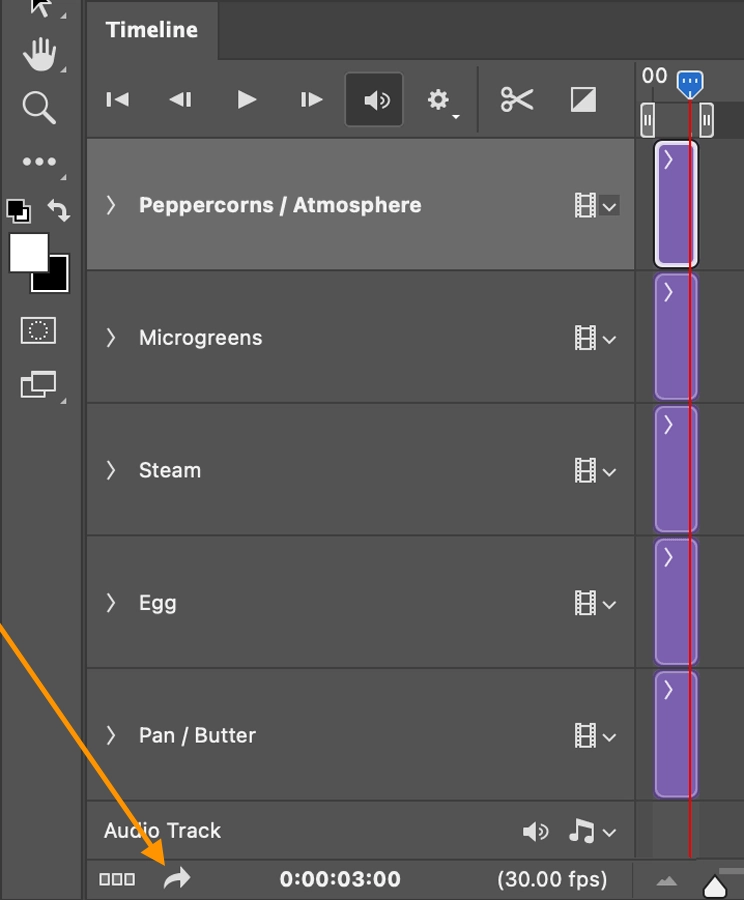
Then, you’ll need to convert your frame animation timeline to a video timeline by clicking the ‘Convert to Video Timeline’ icon in the bottom left-hand corner of the ‘Timeline’ panel. You can adjust the length of each frame before converting to video by selecting a longer delay, or you can simply click and drag the edge of the clips while in the video timeline view. However, I find it quickest to switch back to the ‘Frame’ timeline view, change the delay, and then switch back to the ‘Video’ timeline view to confirm the video length.
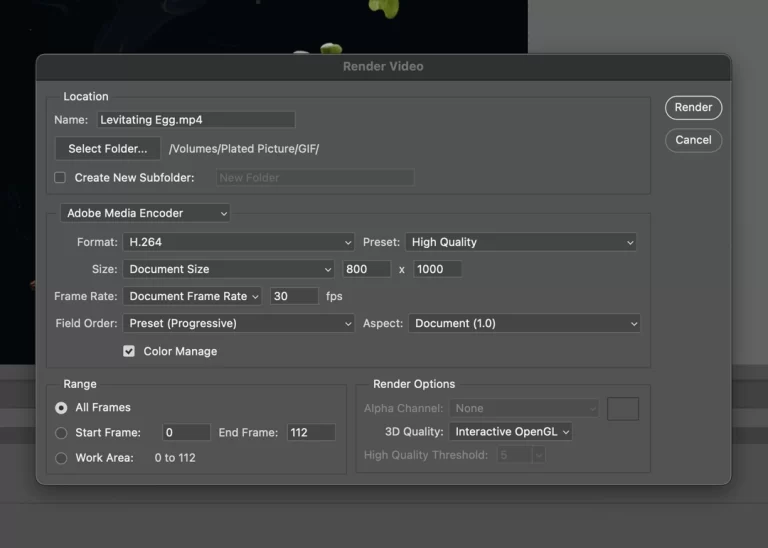
Once you’re pleased with the length, select the ‘Render Video’ button, which is also located in the lower left-hand corner. The ‘Render Video’ dialog box will appear with options for export settings. In the middle section, switch from ‘Photoshop Image Sequence’ to ‘Adobe Media Encoder’ and choose H.26 as the video format. You’ll also want to check if you need to resize the video dimensions to match your animation’s aspect ratio/orientation.
Export Sequence as a GIF For Instagram
Voilà! You did it— Now you know how to create drool-worthy food photography GIFs!